maandag 17 maart 2014

#ToMB month 1

For the first month I’ve got a budget of $60. I didn’t have to spend it all so I didn’t for the first month.
I’ve spend my money on the metal box set of Kirai. On the store website it was around $ 41 so I’ve also bought the totem ‘lost love’ which would cost me another $9.50. That left me another $9.50 to spend in the second month.


So for the first month I had to paint 7 models. That was quite of a challenge for me since I have a quite busy real life at the moment, but in the end I succeeded in my attempt (except for the basing of Ikiryo, which changed since the metal box set from a 30 mm to a 50 mm base).

Black cat bases
So for the first month I’ve tried to paint all my models for the first month. I also bought some bases from black cat bases a long time ago, which I’ve used for my crew and they look great for this crew.
I tried to use 2 main colors and one contrast color in all my models. The 2 main colors would be purple and green and the contrasting color will be red. I’ve tried to use them in one form or another in every model.
Ok, so now let’s have a small breakdown of the crew I’ve got for the first month and give my impressions of her playstyle.


For my basic crew I’ve got the following set-up:
1x Kirai Ankoku
1 x Ikiryo
1x Datsu Ba
2x Onryo
1 x Seishin
1x Lost love


Without upgrades this crew is 22 SS with a cache of 3. It’s not the most expensive crew in the resurrectionist’s  range and I’ll probably have to buy a lot more models to get at a decent 50 SS crew, but that’s something we can work on in the following months.


The crew itself:
If you look at the cards for this crew you can see that some of the key models have a cost of 0 and they can only be summoned by Kirai or her crew. So she really has a summoning crew and can really buy some other interesting models that can fulfill different roles in her crew that her spirits perhaps can’t accomplish or have some difficulties with.

Her crew itself isn’t that quick, but she and her crew can use some movement tricks to get her models into position. Kirai can switch models around and some of her other models can push friendly spirits around or make them take a walk action.
Her models have a decent survivability because of the incorporeal special rule. They don’t have that much wounds but the crew have a decent range of healers so that they can restore damage they’ve got from enemy attacks or summoning spells.

The crew uses wounds as a resource. Most of the summoning works as follows: you target a friendly model. You summon a spirit into base contact and both your models suffer half the summoned models wounds total. So you can potentially summon 2 models of one of your own model, but the chance will be high that the original model will be killed in the process.

The theme this crew works with is the condition ‘adversary’. This condition will make your spirits better against the model with the ‘adversary’ special condition. For example a spirit gets a + flip to attack flips when a model has the’ adversary’ special rule. So you need to give enemy models this condition as soon as possible during your turn.


Now up to the models themselves


Kirai Ankoku
She is the master and the most important member of the crew in my opinion. She is the one that does most of the summoning, be it via spells or her innate abilities. She can let Ikiryo pop out and let it deal lots of damage, but she can summon a spirit she needs at that time.
She has a low Df, but the Manipulative 12 gives her some kind of defence against Attacks. She also has a defensive trigger which deflects attacks onto friendly spirit models within 2’’.
She has one basic shooting attack with a decent range of 12 and a decent damage spread. There are 2 good things about this attack; first you don’t have to randomize when shooting into an engagement and also give the ‘adversary’ condition when it succeeds.
She can summon a seishin for a 0 action and can also summon other spirit models for a 1 action. The higher the Ss cost of the summoned model, the more difficult the casting will be.
Also she can switch positions of 2 friendly spirits for a 1 action.
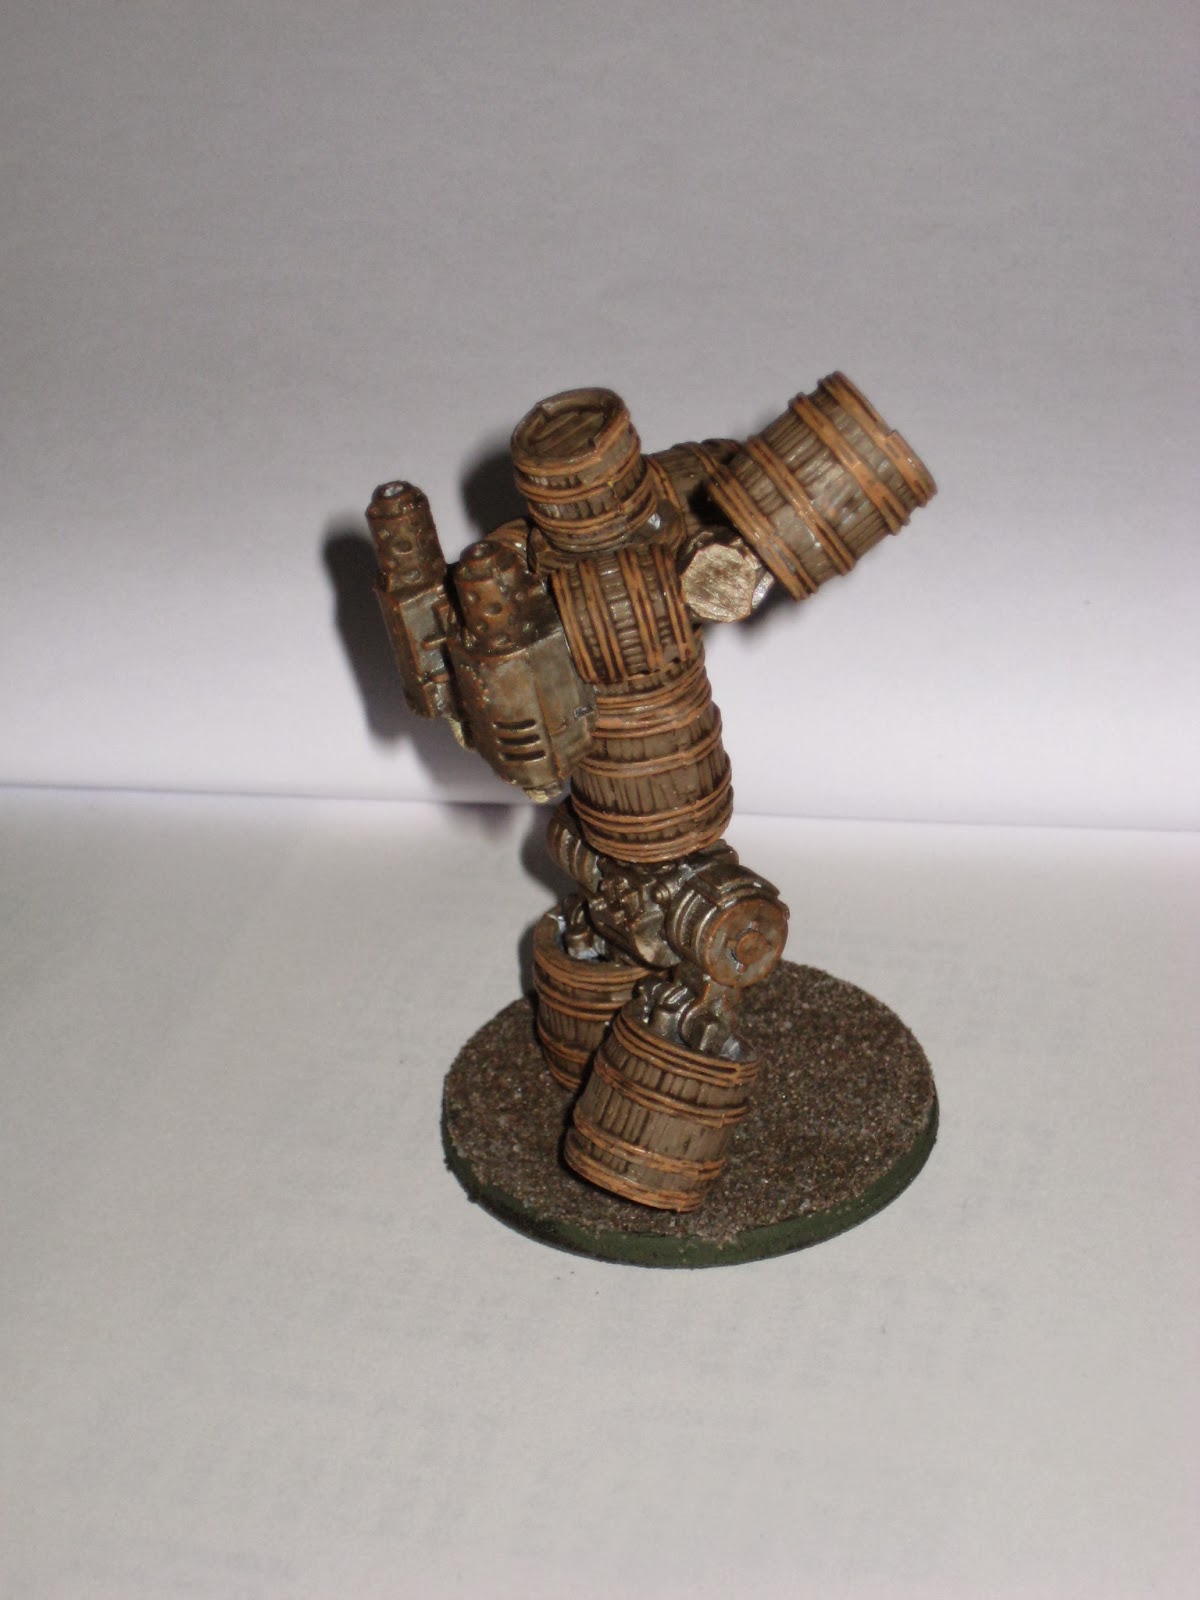
Ikiryo
Finished in time to see that the 30 mm has to be a 50 mm
This model is only available through Kirai or her totem.
He is a beatstick and has a large range of 9. His walk is only 2 so he really needs to get the charge off.
He can push spirits 4 inch toward this model (more movement tricks).
He is also incorporeal and his attacks ignore armor.
Overall he is great model and it’s free to boot (after the card or 1 SS cost).


Datsu Ba
It is the only henchmen in the crew.
He is incorporeal and terrifying all 12.
Both his shooting and melee attack have a decent 6 and a crow.
It has also 2 0 actions which are both movement tricks. One to deny walk actions on enemy models and 1 for your own spirits (a free walk action).
Overall this is a great model, the only downside is the great choices in 0-ctions ( and another upgrade which also give it a 0-action).
Also he is one of the only models in the basic crew that has the undead characteristic which means you can use this model to pop Ikiryo out.

Onryo
In the base set you get 2 models in the crew. These models are the ones you need to hand out the ‘adversary’ condition, because every time they suffer damage from an enemy model they pulse and hand out the condition.
Also they have a casting that hands out the ‘adversary’ condition.
They also can hand out poison to models, which can be handy with some of the models I’m going to buy in the coming months.
Overall a good model for a SS cost of 5.

Seishin
Another spirit that is free. Only Kirai’s crew can summon them. You can have up to 5, but I don’t think you’ll ever have more than 3 on the board at one time.
They can give out more protection by sacrificing them and make a model immune to blast damage and pulses.
The trick with this model is to use this model to summon in other more expensive models. The only downside will be that you need to kill off this seishin in order to summon your more expensive model.

Lost love
He is the totem of the crew. He can also summon in Ikiryo with one of his ability.
He can place himself into contact with a friendly Master or henchman with 12’’ for a 1 action and he can also heal spirits or the leader.
I find this model to be a great addition to the crew. He is 4 SS but the amount of damage it can heal is great. (Basically, every point you heal on a incorporeal model is 2 points worth).


This crew works great together and once you can set up in a place where you feel you can accomplish some of your strategies and schemes. From there you can send out your models to accomplish the different schemes and strategies.
I think you need a turn or 2 to set up and summon in the more expensive models, but once it gets going and you have several models with the adversary condition I think you can kill off those more important models more quickly.
The only thing the crew is suffering from in this stage of the build is the lack of models that can actually go out and accomplish schemes. You need most of your models in the vicinity of Kirai to get the most out of the model. Once they get separated they can be picked off quite easily.
In the future I will be looking into models that are more beefy and can go venture out on their own to accomplish some VP hunting.


For my second  month I am looking into some models that I can summon in.
I think I will be getting a shikome to start with and another packet of seishin.
If I’ve got some more money to spend I might get some more spirit models like Jaakuna ubume and some drowned. I feel these models are very thematic and will add some additional movement tricks and damage types (hazardous terrain as a damage dealer).
To top the list off I will be getting some Gaki models (they can be summoned in after a few triggers) and some standard undead models (like a rotten belle or a flesh construct) to have more of the undead characteristic into the crew.


I guess that is everything for the first Tomb month. Hope you all liked it and hopefully I’ll get a new post done in time for next month.

woensdag 26 februari 2014

Review: Malifaux scheme and strategydeck

For my next installment of my blog I wanted to review something I’ve had for more than over a month now.
I have bought some scheme and strategy decks from a fellow Malifaux player: @PFalcon83 on twitter. It’s a custom made deck which helps me to remember my schemes and strategies.

So what can you expect when you want to order some of these decks. You get the following things:
1. The schemes and strategies
2. Cheat cards for flipping and some of the conditions
3. A nice storagebox to put the decks back in again.


You get 2 sets in the  storage box, so it’s an ideal thing to use for demos or to play a game in a casual environment. Our local henchmen all bought one and I’m going to give one away as price support for my upcoming tournament.
Here you have some of the cards. Let me give you a few reasons why I like this deck.


First the quality of the cards is great. It feels like the statcards of the new M2E. It gives it an extra edge of durability I think.

Next is the lay-out. It’s very clear what number the scheme and strategy is. Also there is a distinction between schemes and strategies.

The last thing to point out is that @PFalcon83 communicated very quickly and correct about the delivery and price. Within a few days the cards were mad and on my way. The only downside is the shipping cost, which isn’t @PFalcon83’s fault. If you live in the Us I think the price will be much lower since the shipping was actually more than the cost to make the decks.

The only small complaint is that the cheatcard is a little smaller than the actual card itself so you have a few white edges. But that’s not really an issue since you can still clearly read everything that’s on the card.


Overall I’m very pleased with the product and I give it an


vrijdag 7 februari 2014

And now for something completely different


For this weeks installment i’m going to talk not about gremlins, but something else that is green and that is the ressurectionsts. I’m going to have a monthly blog about my favorite rezzer master Kirai. Mind you I haven’t played a game with her, but here theme and playstyles is something that appeals to me.

The old metal box set


So for the next couple of months I’m going to do a small blog about a master that I loved, Kirai. There is a challenge, for those who don’t know it already, about starting up a new crew for the next 6 months.
I’ve got a unpainted and mostly unassembled Kirai crew and now I can have the motivation to start building and paint it. I don’t expect to do well during matches, but I would like to see some progression toward the end of the 6 month in painting and playstyle.
So for the first month I’m going to build up the metal starter set and the totem. I think that the actual price (when they are re-released will be around 50$. So I’m going to add 2 more seishin in the mix to round it on a nice 60$.

New artwork for Kirai
The reason for this is that we can show new players how to buy a crew within an affordable budget. Of course you need paints and other hobbysupplies, but I think that you can still enjoy the hobby with a small budget and hope I can talk about ways to cut down on cost during the coming months.

After the initial box set we’ll see what I’ll be adding to the mix. I’ve gotten everything I need to round out the crew (I’ve even got the avatar and I’m looking foraward in adding this model into the mix as well).

In the coming month I’ll try to plan and strategize what and when I’ll be building some of the models. I don’t have a massive amount of time, but I hope to finish off the spiritcrew at the end of the month.


I’m very excited and hope I can show off some of my painting and modeling skills. 

For more info on the different bloggers: 
http://taleofmalifauxbloggers.blogspot.co.uk/
http://wyrd-games.net/community/topic/98442-tale-of-malifaux-bloggers-tomb/

zondag 2 februari 2014

A Forthnight in Hobbying

Ok, instead of a weekly dissection I bring you my custom made Whiskeygolem.

So I started bying this from Renedra limited (2 packs of 10 barrels):

http://www.renedra.co.uk/webstore.html


After that I started assembling a few barrels to make the legs and lower part of the body. 

I also bought some  legs, feet (which I didn't use in the end) and the exhaust of a dreadnought from GW. 
I cut up the legs to place them closer together.


As you can see the exhaust was used as a backpack and also it was a way to disguise the arms a bit. I mad shoulderpads out of one of the smaller barrels.


After assembly I pinned the 2 parts together and then undercoated it white. After that I did the barrels and ropes in brown and the exhaust and arms in metal.

I gave it all a brown wash and then used the new technical paints from GW (Rust and corrosion). I'm very pleased with the paints. They are easy to use and give a good finish to the model.


Hope you enjoyed this and I can't recommend the people at Renedra enough. A small range to convert with, but it's a awesome quality and it's great if you just want some scatter terrain on the table.

zaterdag 25 januari 2014

Gremlin dissection: bayou gremlins

In this dissection we have a look at the humble bayou gremlin. He is really the bread and butter of the faction and I’ll try to explain what tactics can be used in conjunction with this minion.


The stats
This minion is fairly average in his stats. There is nothing that jumps out at you and it should because you are paying only 3 soulstones for this critter. He is one of the lowest costing significant models that is also very versatile in what it can do on the board. He only has 4 Wounds and a WP of 4. He has a WK of 5 and a Charge of 7, which can give him a 13’ threat range if needed.
Overall, you get what you pay for cannonfodder to use when needed.


The skills
He has an interesting ability: Bayou Two Card. This allows him to cheat the top card from his deck. This can be a good thing or a bad thing. If you don’t want to spend a high card to cheat a low flip, why not use this ability to improve your duel. You can get lucky and draw a 13 of rams or get a 1 of crows.
Remember that you can Cheat Fate here and so can also cheat you damage flip if you wanted to (and can of course)

The next one is Drunk & Reckless. This ability gives you 1AP at the expense of 2 wounds. You have to declare it at the start of your turn, so think before you start to move. I normally don’t have a problem with my opponents if I do an action first and then say I’ve taken this ability, but in tournaments you need to watch out and try to remember it.

You can reduce the wounds however with the help of Lenny. More on this later.

The last one is High Pitched Squeel. This is a defensive trigger on a mask which lets you push away after a Ml attack. Normally the gremlin is dead after the first strike, but it’s still a fun ability to have.


The actions
He has 2 actions.
The first one is Boomstick. It has a Shooting of 4 and a Rg of 12. The damage is a low 1/2/3(blast), but that’s not all the shooting attack does. He has 4 triggers on his gun and you need to declare a trigger if possible. So, You’ll always have to use one and this can be an disadvantage as well.
The triggers that you need to declare are all suit related. One is the Dumb luck trigger which allows you to deal double damage and you suffer half. Another one is Whoops, Ricochet which deals 1 damage to friendly gremlin within 12 and LoS(so if you can’t see anything the trigger doesn’t go off). The next one, What if … more powder?, gives you more blasts on your attack. And the last on, I got ‘im, Pa!, pushes you 3’’ toward the enemy target.

The second attack is a basic Ml attack of 4 (Banjo Bash) and a range of 1. The damage is a low 1/2/3. There are no triggers. It can be useful if you only need to do 1 Wd on a model before it is dead, otherwise you know that your bayou gremlin isn’t on the board at the end of the next turn.


The tricks
It’s a minion, so you can’t take upgrades with this model.

The upgrades that work with this model is: Show off
This allows you to take a 2 action and make a casting flip. If you succeed everything in a range of 2 suffer 3 pulse damage. This is a nice one to give to Lenny since he is Ht 3 and I’ll only use this if I’ve got a lot of gremlins at my disposal. You need to sacrifice the model afterwards. So it can be a help in reckoning if you see that your gremlin is about to die. Blow him up before your opponent has the chance to kill him / her.


The looks
I really like the look of the new models. I am going to buy the new box set because you need to differentiate between the models. I own all the old bayou gremlins twice, so if I have 4 other gremlins, then there will be no more discussion about who was summoned and who had some wounds ect.
I like the attitudes of the models as well. They look vicious and mean, a bit less cartoony than the old models (which I find a bit sad).


The playbook
You can see the gremlin in a few different ways.
First he can be a resource. You need them to summon more gremlins with Somer. So you will need at least 2 or 3 to get the summoning train on the rails. And if you lose one early you need to have a backup or two just in case. So stock up on this little minion.

Secondly they can be bought to out-activate your opponent. They are cheap; so if you buy of them then you only have spend  12 points. If you buy 8 you’ve only spend 24 soulstones. These 8 models are probably more than your whole opponent’s crew.

Now why do you want lots of these gremlins? Well in certain scenarios like reconnoiter and stake a claim you need the models to achieve your objectives. The same can be said for certain schemes like plant explosives or breakthrough. All you need to do is spread out a bit and your opponent needs to divide his troops in order to deal with your VP scoring threat.


Another thing to think about is that these models are fast. It isn’t ap

parent in their profile, but with the ability to gain an extra AP you can move 15’’ on the board. That’s almost half of the table turn 1. You need to take 2 wounds but in the next turn you can lay down a scheme marker on the center line or interact with terrain or other models in the enemies half of the table. That alone is huge. You have mobility and speed to counter any model that threathens to come close. In a last resort, run him in and let him explode or tie the model up for a turn (use defensive stance then) so he can’t make that move that was crucial for that turn.

Last thing to remember. Lenny. He is so good with these Bayou Gremlins. He can give them an automatic ram in their attacks which inflict double damage. He reduces their drunk and reckless ability to only 1 WD. He can chuck these models up the board (you can't take interact actions this turn though), and let them move up to 25'' up the board. So he is really a key piece when you use a lot of Bayou Gremlins.

Hope this helped you fellow greenskins out there. See you next time.

zondag 19 januari 2014

Gremlin dissection: Lenny

In this dissection we have the Green mean dumb fighting machine: Lenny. He’s an enforcer that has a great supporting role in most gremlin crews.

The stats
He has a DF of 4 and a WP of 1, which is very low. The WP can be a problem, but as we delve into the model this isn’t that big of a problem as you might think. His cost is 9, which is high and a Ht of 3 which can be a problem when you shoot at him in combat.
Overall he is pretty average in his stats. Where he really shines, is in his passive abilities. He gives  your crew some buffs and reduces the damage your models take.


The skills

He has the ability Big target. This aura reduces all damage by one to a minimum of 1. The range is a bit short, but if you keep him near your key models, then you can make the most use of this ability. What does this ability mean? For your basic bayou gremlins this means that your drunk and reckless ability only costs you 1 wound instead of 2.

Also it means that you ignore damage from every source. It isn’t armor so” ignore armor abilities” don’t  apply to this. Burning damage is reduced ect. This is quite a useful ability to have.

He has Hard to Wound +1.  A nice ability to have since this is the only real defense you have.

Dumber luck is the most important reason why you take Lenny. He gives all gremlins and pigs in the aura-range the ram suit in their total. So this means that all your bayou gremlins and masters like somer and Ophelia have the dumb luck trigger automatically if they want. There are only a few times when I don’t take the dumb luck trigger on my gremlins. The damage potential they can dish out is huge and your opponent will think twice when they want to get into range of your gunline.

The last ability is Numbskull. This ability makes him immune to conditions. So this means for all negative abilities (like poison, burning, paralyze and slow), but also your positive abilities (like focus, defensive stance, fast). This is a good ability against crews  like Rasputina who hands out slow and paralyze or Pandora which makes you tale horrorduels (you can fail the duel, but are immune to the paralyze).


The actions

He has 3 actions.

The first one is Whack’n Stick. It has a decent Ml of 6 and a good damagespread. The trigger is a nice one on a ram. If you succeed, the enemy may not declare walk action while engaged .

What this means is that you can’t move away from Lenny or another model in which you are engaged with. Even if Lenny is gone you still can’t move if there is an enemy model in Ml range. This can be handy if Lenny is pulled away by a movement-trick  (Ooo, a girl for example)and the target enemy model is still engaged.
Overall a nice attack to have.

Next one is the Toss ability. You can push a Ht 1 model 10’ away from you.You reposition your own models or deal with enemy models that are too close to Lenny or other key models. They can get Dmg if they come in base contact with models or impassable terrain, so that’s a bonus. They also become insignificant.

The last one is a healing flip which requires a 9 of any suit. The Pet the Piggy! ability is a bit too difficult to cast so I rarely use it. You have other abilities that can heal up gremlin models.


The tricks

I tend to go low on upgrades on this model.
The only 3 I would consider are:

I’ll love it and pet it … : this gives you a shooting attack which can summon a piglet on a trigger. It’s only one soulstone, so if you have one to spare you can give yourself some more summoning-abilities.
It doesn’t have a shootingsymbol, so cover doesn’t apply to this attack. Something to consider …

Show off: this one can be handy if you play in a bayou heavy list. Somer comes in mind for this upgrade. You can stick it on Lenny instead of somer to free up an upgrade for somer. Also he is Ht 3 so he can draw line of sight over Ht 2 terrain.

Dirty cheater: I wouldn’t use this one on him regularly. The more optimal choices are Francois and your master, but if you have kill protégé in you scheme pool, then this one can make Lenny  a little bit more durable.


The looks

I like the look of this model. He has thez allure of a dumb brute and the piglet is quite funny. I like the old model too though. I can’t wait to get my hands on a new plastic Lenny.


The playbook

Like I’ve discussed before he is a great buffer in your crew. He works great with the Wave 1 masters: Somer and even more so with Ophellia. I don’t have any experience yet with the wave 2 masters.

Keep him back away from danger. He has 10 Wd, but can go down fairly easy if left unprotected. A slophauler near him can do wonders to keep the wounds to a minimum.

I sometimes use the toss ability when needed. Normally I try to toss Pere Ravage up the field and then let him wreak havoc .


Overall an excellent piece on the board, but you need to watch out for his low Wp.

zondag 12 januari 2014

Gremlin dissection: Pere Ravage

In the next dissection of the gremlin crew we have Pere Ravage. He’s the “heavy blast and pulse dealer” gremlin in the La Croix family.

The stats
He also has an average statline with the exception of his low WP. He is a cost of 6 and has 7 wounds. It’s pretty good, because you are going to try to be a deterrent to your opponent and for 6 points that’s a good deterrent in my eyes.


The skills
He has the ability Reckless which gives him an additional AP at the start of the turn. This will cost him 1 wound.

He has explosive demise 4 so everything around him in 2’’ range gets 4 damage when this model is killed (and not sacrificed, which means that he only explodes when he is reduced to 0 wounds) This can come in handy when he gets stuck into Ml and then you can try to shoot him. If you hit this model then you can potentially kill more models than you could normally. This makes an excellent piece to drop into the enemy lines and be a nuisance to deal with without losing a lot pieces in the process.

The last ability he has is Squeel, which is a defensive trigger and needs a mask. You can push away 4’’from a Ml Attack after you received damage. You can potentially stop a second attack on a charger or stop a Flurry action.


The actions
He has 2 attack actions: Burn Stick and Breathe Fire.
The Burn Stick has a rg of 1 and a Ml of 5. it does blast damage on medium and double blast on severe damage. on a ram he gets critical stike, which give +1 damage for every ram in the total.

The Breathe Fire attack has a rg of 8 and Sh of 5, which is fairly average. In all honesty, I’ve never have used this attack during my games. It has a lower damage output than the mL attack, but the same blasts apply here. On ram though it does triple damage. The downside is that you have to sacrifice the model, so his explosive demise doesn’t work.

He also has a tactical action Oopsie!.
This has a casting and a TN of 10 and a tome, which is a bit more difficult to get since you can’t use soulstones. The action lets everybody in a pulse of 6 make a TN Df 13 duel or suffer 5 damage. You can do this action 2 times of you want. And with a reckless action you can move up and do this action twice. Your model is killed afterwards of course, but you get an explosive demise of because he was killed and not sacrificed.


The tricks
The only upgrade I would consider is team work. Not for the innate ability to make you Ht 2, but for the 1 action, which places this model in bas contact with an enemy model and makes you push your other gremlin model out of harms way. That way the regular harmless bayou gremlin for example can become this exploding gremlin which can cause a lot of serious damage in your enemies crew.


The looks
I like the new model. It’s quite quirky and gives the gremlins back some of the random silly-ness that the new art is missing a bit in my eyes. I’ll definitely get the new model once it comes out and perhaps use this new model instead of the old model (when it is released).


The playbook


This model is there to do 1 thing. It needs to explode and take other models with it. It’s not a good model in reckoning, but in the other strategies it can become a board control character.

You can use him in different ways because of the blast damage and the pulse damage. You just need to kill him yourself or let him be killed by your opponent. Otherwise you do’t get the full potential out of this model.
Now to get it into enemy lines you can do a few things.

One, do the reckless ability and walk him up 15’

Two, toss him with Lenny. You become insignificant, but that’s not why this model is on the table. You can even deal some more damage with this toss if you push him against another model.

Three, you can launch him with the pigapult anywhere within 24’. You can drop a bomb in the enemy line and normally you out activate your opponent so your paralyze usually isn’t an issue. Just wait until your opponent is done with his activations and then launch Pere. Then let him activate and lose his paralyze. Next turn he is ready to wreak havoc.

Four, if you play with Ophelia you can push him into base contact with here and then move him further. This gives you an extra moveboost.


Five, the upgrade team work can move him into enemy lines and get your own models out of harms way.